How to make your own Sprinkles

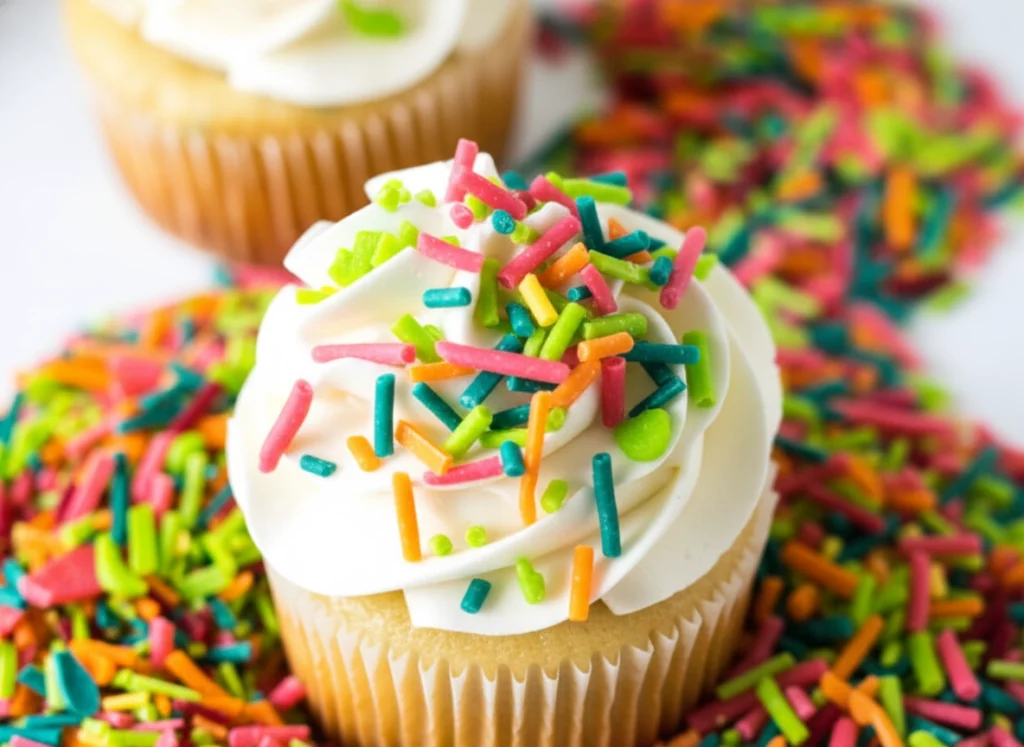
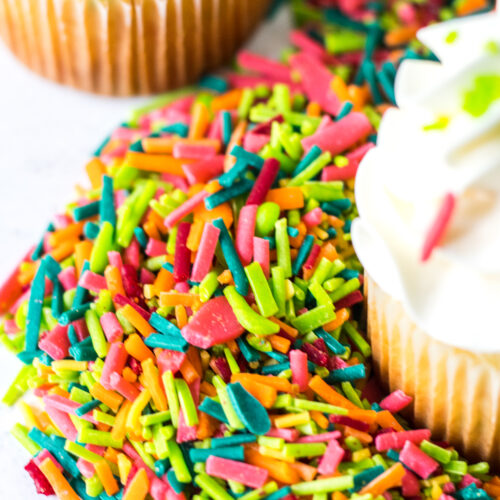
I believe that a handful of sprinkles can instantly make any dessert feel more fun. My homemade sprinkle recipe is one of my favorite easy cake decorating projects because they only need four ingredients and you can customize the colors and flavors however you want. It is a simple way to add a personal touch to cupcakes, cookies, cakes, ice cream and brownies while giving your treats that extra pop of celebration.
Why You’ll Love This Recipe
There’s no doubt that store bought decorations can be very convenient, but here is why I believe making your own sprinkles will become your new favorite choice:
- Only 4 ingredients – You probably already have everything you need in your kitchen which makes this recipe quick and budget friendly.
- Super customizable – Choose any colors to match birthdays, holidays, or your favorite theme.
- Beginner friendly – No special tools or skills required. Anyone can make these!
- Homemade with heart – Little imperfections make these sprinkles feel personal and handcrafted.
- Perfect for all kinds of treats – Cupcakes, cookies, cakes, brownies, and even ice cream all look more fun with sprinkles.
Equipment You’ll Need
- Bowl – For mixing your sprinkle base until everything is smooth.
- Hand or stand mixer – Helps blend the mixture quickly and evenly.
- Rubber spatula – Scrapes the sides of the bowl so nothing goes to waste.
- Small bowls – Used to divide the mixture before adding different colors.
- Plastic spoons – Great for stirring in gel coloring and scooping mixture into piping bags.
- Sifter – Keeps the mixture smooth by removing any lumps.
- Gel food coloring – Adds bright color without thinning the mixture.
- Piping bags – Makes it easy to pipe thin lines that will dry into sprinkles.
- Piping tips 3, 4, or 5 (optional) – Helpful for controlling the size and shape of your sprinkles.
- Parchment lined baking sheet – A nonstick surface for piping and drying the sprinkles.
What You’ll Need to Make the DIY Sprinkles
You won’t need many ingredients to make the DIY Sprinkles. If you’re ready to prepare them, make sure you have:
- Powdered Sugar. Sift your powdered sugar before you use it.
- Vanilla Flavoring. Using this flavoring gives your sprinkles that perfect taste that goes great with lots of desserts.
- Corn Syrup. You’ll add the corn syrup to a mixture of powdered sugar, vanilla flavoring, and a bit of water.
Besides these three ingredients, the only other ingredient you’ll need to use is water. Who knew it was that easy to make sprinkles from scratch!

Step-by-Step Instructions
Step 1: Sift the sugar
Place a sifter over a bowl and sift 1 cup of powdered sugar. Discard any lumps. Add the water, flavoring, and corn syrup.
Step 2: Mix until smooth
Stir until all of the sugar is fully saturated and the mixture looks smooth.
Step 3: Add the remaining sugar
Sift in the remaining 1/2 cup of powdered sugar and mix until everything is combined.
Step 4: Divide and color
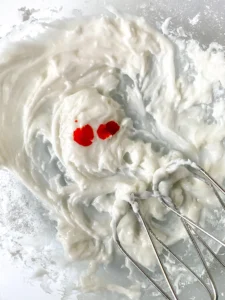
Split the mixture into small bowls. Add 1 to 2 drops of gel food coloring to each. Go a little darker than you want since the colors will lighten as they dry.
Step 5: Fill the piping bags
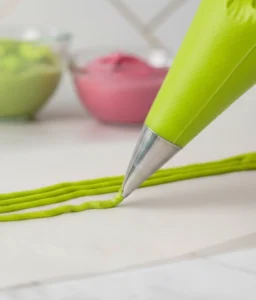
Spoon the mixture into piping bags fitted with a small round tip, or snip a tiny opening if you are not using a tip.
Step 6: Pipe the lines
Line baking sheets with parchment and pipe long, thin lines across the surface.
Step 7: Let the lines fall
Hold the piping bag slightly above the parchment so the mixture falls naturally instead of dragging. This helps keep the sprinkles even.
Step 8: Dry completely
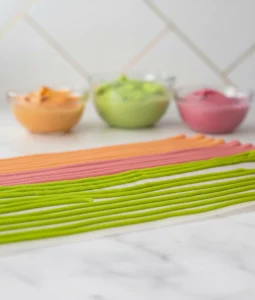
Let the lines sit in a cool, dry place for at least 12 hours, or until firm.
Step 9: Break into sprinkles
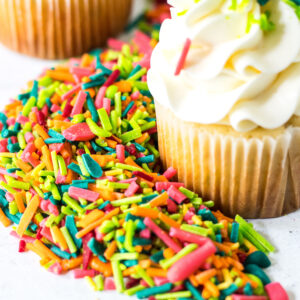
Gently break the lines into small pieces and enjoy your colorful, homemade sprinkles.
Tips for Success | Helpful Notes
Before you get started, here are a few tips to make these DIY sprinkles come out just right:
- Adjust the color – The sprinkles will lighten as they dry. So start with a slightly deeper shade of color than your final goal.
- Keep the lines thin – Thin lines dry faster and give you the perfect sprinkle size for decorating.
- Use a dehydrator to save time – A dehydrator can help the sprinkles dry faster and more evenly, especially in humid environments.
- Use gel food coloring – Gel colors provides bright color without thinning the mixture.
- Have fun with shapes – Break them shorter for small confetti pieces or make tiny stars or dots for a custom look.
Storage Instructions
Here are a few tips to help you keep your homemade sprinkles fresh and ready to use whenever you want to decorate a treat. These sprinkles store well so you can easily make them ahead of time.
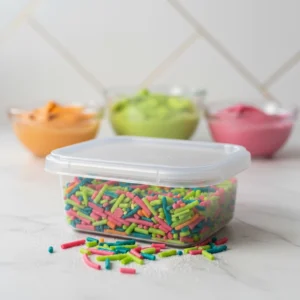
- Store in an airtight container – Keep the sprinkles sealed so they stay crisp and unable to absorb moisture from the air.
- Storage Temperature & Shelf-life – Store the container in a cool and dry place for up to 3 months.
- Avoid humidity – Moisture in the air can make the sprinkles soft or sticky. So keep them in a dry environment.
- Fully dry before storing – Make sure the sprinkles are completely dry before storing or they may clump together in the container.
FAQ’s | Frequently Asked Questions
It’s best to use piping bags to pipe long lines that will eventually turn into the sprinkles that you’ll add to your favorite treats. If you’re not sure where to find them, check Amazon for a vast selection of piping bags.
While you can use any piping tip that you prefer, some of the best ones to use when creating the DIY Sprinkle are piping tips 3, 4, and 5. If you have one of these, consider using it to make the perfect lines.
Use gel colors in your mixture to add colors to the sprinkles. You can choose from electric Americolors or primary colors, such as blue, red, green, and pink. Select the colors that you like most to create the perfect custom sprinkles to use.
Yes! You can change the flavor of your sprinkles by including extracts in your mixture. Although vanilla extract is a top choice because it’s a classic, there are plenty of other great extracts to use, such as banana, chocolate, coconut, and coffee. The exact flavor that you’ll use will depend on what you’re preparing.
Related Recipes
Tutorial Video Walkthrough
On a personal note…
I’ve always loved the look of sprinkles, but the waxy, flavorless taste never lived up to the excitement. That’s why I started making my own. These homemade sprinkles are sweet, fun to make, and they actually taste good, especially because you can add a flavor that complements your dessert. Once you try them, you might not go back to the store-bought kind.
Recipe Card | DIY Homemade Sprinkles
Equipment
- Bowl
- Hand or Stand Mixer
- Rubber Spatula
- Small Bowls
- Plastic Spoons
- Sifter
- Gel Food Coloring
- Piping Bags
- Piping Tip 3, 4, or 5, optional
- Parchment lined baking sheet
Ingredients
- 1 cup powdered sugar, sifted
- 2 tbsp water
- 1 tbsp corn syrup
- 1 tsp clear vanilla flavoring
- 1/2 cup powdered sugar, sifted
Instructions
- Place a sifter over a bowl and sift 1 cup of powdered sugar, discarding any lumps.
- Add in water, flavoring, and corn syrup.
- Mix until all of the sugar has been saturated with liquid.
- Sift in the 1/2 powdered sugar. This extra powdered sugar will help the liquid mixture set.
- Split the mix into bowls. Add 1-2 drops of gel coloring (you want the color to be darker than you'd like as the color will fade during the drying process).
- Add sugar paste to piping bags, fitted with a tip (or omit the tip and just cut a small hole at the tip).
- Pipe long lines of the sugar paste on parchment-covered baking sheets.
- Make a special note to pipe above the parchment and allow the sugar mixture to fall onto the parchment vs dragging it across.
- Allow sugar paste to set in a cool dry place for a minimum of 12 hours
- Break the lines and enjoy your custom sprinkles!